Showing posts with label food and recipes. Show all posts

Saturday, October 23, 2010

pumpkin whoopie pies from tasty kitchen/dinah

One of the most difficult aspects of living/studying abroad (especially for a significant amount of time) is that you start to miss American foods.  Seriously.  You wish it wouldn't happen.  You wish you could go on loving the local delicacies without so much as a second thought about the foods you'd left behind.  Unfortunately, (at least for me) this was not the case. I'm kind of embarrassed/ashamed to admit it, but after awhile I would have given anything for a good cheeseburger or pancake.

That being said, it should come as no surprise that some of my most vivid memories from my year in France involve American food.  Just when the homesickness really started to set in, Dinah and I went on a trek to find the rather elusive, potentially mythical American Grocery Store.  We probably could have looked up the address online, but there was some joy to be had in the hunt.  When we finally found it, we were overwhelmed by this funny mix of Lucky Charms and Fluff and Duncan Hines cake mixes set in a distinctively Parisian setting.  A small shop, with shelves filled floor to ceiling.

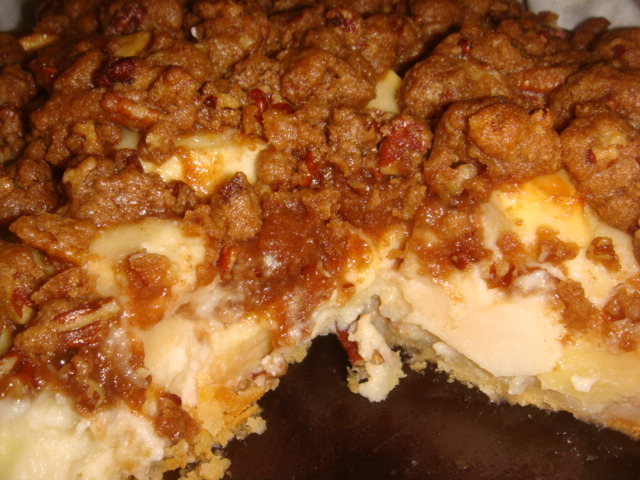
After spending a good while swooning over the American foods I wouldn't even consume in America, Dinah and I settled upon splitting a piece of carrot cake with cream cheese frosting.  (You see, American food in Paris also comes with a hefty price tag.)  And it was so delicious.  Probably not the best carrot cake I've ever had (my grandmother made a pretty mean one), but at the time I'm sure I would have told you otherwise.

As the year continued, we found a few more occasions to have American food.  In the spring, Mike, another student in the program, received a care package from his parents that included the biggest jar of peanut butter you've ever seen, fluff, and American bread.  He, extremely generously, brought it to school where almost all 40 of us joyously sat down to the most delicious pb and fluff sandwiches of our lives.  Later, there would be copious amounts of pizzas to go, which got Dinah and me quite a few stares in the metro, TexMex for my birthday (complete with Heinz ketchup---such a treat!) and vanilla milkshakes.

These memories are some of the best of my time abroad; remembering them will always make me smile.  The enjoyment of eating this food is amplified when you're abroad, because it always feels a bit sneaky or like you're breaking the rules.


So, when Dinah wrote to me from Italy (she's studying abroad again), asking me to make the Pioneer Woman's Pumpkin Whoopie pies, so could live vicariously through me, I happily obliged.  Of course, right now it's funny to think of what I wouldn't give to trade places with Dinah and get my hands on some delicious gelato and pizza.


Pumpkin Whoopie Pies
added to Tasty Kitchen by cakedutchess

For the cakes:
1 2/3 cups flour
1 tsp baking soda
1 tsp baking powder
3/4 tsp salt
1 tbs pumpkin pie spice
1 tsp ground ginger
1/2 stick unsalted butter, melted
3/4 cup packed light brown sugar
2 whole large eggs, at room temperature, lightly beaten
1 cup canned pumpkin puree
1 tsp vanilla extract

for the frosting:
1 stick butter, softened
8 oz cream cheese, softened
2 cups confectioner's sugar
3/4 tsp salt
1 tsp vanilla extract

Preheat the oven to 350 degrees. Line two baking sheets with parchment paper.

In a medium bowl, whisk together the flour, baking powder, baking soda, salt and spices.  In a large bowl, mix together the melted butter and brown sugar until smooth.  With a mixer on medium speed, beat in the eggs, pumpkin puree, and vanilla extract.  Fold in the flour mixture.

Drop 12 large mounds of batter onto each parchment lined baking sheets (mine didn't make quite this many).  Make sure to space evenly.  With floured fingers, gently press down on the center of each mound to flatten out a bit (I didn't do this).  Bake for about 10 minutes or until springy to the touch.  Transfer to a rack to cool completely (if you can wait that long).

Frosting: Beat the softened butter with the cream cheese. Add the confectioner's sugar, salt and vanilla and mix on low speed until blended. Then beat on medium-high speed for about 2 minutes until fluffy.

Spread the flat side of half of the cakes with the frosting and top with the other half of the cakes. Enjoy!

Thursday, October 21, 2010

ina garten's pear, apple & cranberry crisp

And the winner of the best apple crisp goes to....drumroll please....Ina Garten! Of course!  I sort of knew this would be the best recipe all along and saved it for last.  Because that way the others wouldn't need to pale in comparison. Unfortunately, we didn't really take any pictures of it.  Sometimes I think you can tell how good a recipe is based on the number of pictures we have.  When it's really, really good, well we kind of forget about the pictures because we're so busy....eating.  So you're going to have to deal with pictures from sea glass hunting:


This apple crisp had the most depth of flavor, which I think has a lot to do with the use of orange and lemon zest.  To be totally honest with you, I was a bit nervous about the orange zest part, because I'm not always the biggest fan of orange flavor.  But it was delicious.  Absolutely delicious.  


The crumble topping was also delicious.  Not too crunchy, not too soggy.  It is this topping that Dan and I have decided we would try next time on the sour cream apple pie.  It maybe didn't get quite as golden brown as I would have liked to see, but once I took a bite, I forgot all about it.  Here's your picture, finally:


pear, apple & cranberry crisp
from the barefoot contessa at home

2 lbs ripe Bosc pears (about 4 pears)
2 lbs firm Macoun apples (about 6 apples...and we, once again, used Northern Spies)
3/4 cup dried cranberries
1 tsp grated orange zest
1 tsp grated lemon zest
2 tbs freshly squeezed orange juice
2 tbs freshly squeezed lemon juice
1/2 cup granulated sugar
1/4 cup all-purpose flour
1 tsp ground cinnamon
1/2 tsp ground nutmeg

for the topping:
1 1/2 cups all-purpose flour
3/4 cup granulated sugar
3/4 cup light brown sugar, lightly packed
1/2 tsp kosher salt
1 cup old-fashioned oatmeal
1/2 lb (2 sticks) cold, unsalted butter, diced

Preheat the oven to 350 degrees.  

Peel and core the pears and apples and cut them into large chunks.  Place the fruit in a large bowl and toss with the cranberries, zests, juices, granulated sugar, flour, cinnamon, and nutmeg.  Pour into a 9x12x2 inch baking dish.

For the topping, combine flour, sugars, salt, oatmeal and cold butter in the bowl of an electric mixer fitted with a paddle attachment. Mix on low speed for 1-2 minutes or until the mixture is in large crumbles.  (Or mix with your hands in a medium bowl.) Sprinkle evenly over the fruit, covering the fruit completely.

Place the dish on a parchment lined baking sheet pan and bake for 50 minutes to 1 hour, until the top is brown and the fruit is bubbly.  Serve warm.

Wednesday, October 20, 2010

sour cream apple pie

The other apple pie I made was a sour cream apple pie (sorry, Dinah, still not the Barefoot Contessa's!).  The combination of flavors sounded very tempting, but I was nervous about how it would turn out.  The recipe also dictates that the pie should be served cold, which kind of eliminates one of my favorite parts of savoring warm apple pie with vanilla ice cream.  BUT, this apple pie is really good and totally worth the lack of warmth.  Especially if you live somewhere where it's not freezing cold yet...this could be a nice alternative to your traditional apple pie.


I always have such a hard time throwing away apple peels.  They're so good and (I think) contain most of the apple's nutrients.  Ugh it pains me to throw them in our compost pile.  Does anyone know of something to do with the peels other than eat them as you go?  I have been doing this until my stomach starts to hurt. 


Did I mention yet that this pie is relatively easy to make? It's not nearly as involved as the first recipe I shared with you.  AND, it is topped with crumble (as you'll see below) and comes with its own simple crust recipe, which involves pressing the crust into a pie plate: a step that totally eliminates my inabilities to adequately roll out a pie crust. Yay!  Don't you love it when recipes don't make you feel like an idiot?


The crumble topping ended up being a bit crunchier than I had expected.  I'm not sure if we should have taken the pie out earlier or not, but Dan and I both agreed that we liked the topping from Ina Garten's take on an apple crisp (recipe to be posted soon), that we would like to substitute that crumble in this recipe the next time around.


The pie kind of looks cheesecake-y, but I don't really remember it as tasting that way.  We made last week, so already the memories are fuzzy.  I need to be better about posting!

Sour Cream Apple Pie 
from Maine Ingredients

Crust:
1 cup flour
3 ounces cream cheese, softened
1/2 cup butter

Filling:
6 large McIntosh apples (we used Northern Spies)
1 2/3 cups sour cream (I added about 1/2 cup of ricotta, because I ran out of sour cream)
1 cup sugar
1 large egg
1/3 cup flour
2 tsp vanilla extract
1/2 tsp salt

Topping:
1 cup chopped walnuts (we had pecans)
1/2 cup flour
1/2 cup butter
1/3 cup sugar
1/3 cup brown sugar
1 tbs cinnamon
pinch of salt

Preheat oven to 450 degrees.

Combine crust ingredients. Blend well with pastry cutter.  Press into 9-inch pan. 

Peel, core, and slice the apples.  Combine sour cream, sugar, egg, flour, vanilla and salt.  Mix well.  Stir in apples. Pour mixture into pie crust.  Bake for 10 minutes.  Reduce oven temperature to 350 degrees and bake for 35 minutes.

While pie is baking, combine all topping ingredients.  Mix well.  Spoon over baked pie.  Bake and additional 15 minutes.  Serve cold.

Monday, October 18, 2010

delicious apple pie

Apple pie is one of the must-make dishes in fall. Originally, I was going to make a sour cream apple pie (I still might did), but when I decided to bring the pie to Machias for our visit with my aunt, I decided to make something more traditional.  (I've never made the sour cream one before, and I wasn't sure how it would turn out.)  Thefoodnetwork.com provided me with the recipe.  Dan provided me with some much needed help in the kitchen.


Hehehehhe. Dan splashed a bit of apple pie filling on his shorts and I recommended that he wear our apron to protect himself (and his precious KU tee).  He obliged to this, but had no idea what else I had in store for him and his wardrobe.  Needless to say, he was not super pleased when I stuck that chef's hat on his head....but I was. 

Anywhooooo.  Dan's help was certainly much appreciated, as this recipe was kind of challenging.  Or at least more involved than most apple pie recipes I'd made in the past. But the extra effort was worth it.  

I don't have a picture of our final pie product, but here's one of an apple pie from the Food Network.  Ha, I know it isn't even the recipe I used, but this post needed another picture.  Forgive me, please.

Plus my crust didn't look nearly that good!  And I used store bought! Well, store bought on top and the other half of my Pioneer Woman Crust on the bottom.  I'm just going to put the recipe for the filling here, but if you click on this link you can find the recipe for the crust too, if you're feeling ambitious.

Food Network Kitchen's Apple Pie Filling

2 tbs freshly squeezed lemon juice
3 lbs baking apples like Golden Delicious, Cortland or Mutsu (I used 8 cups of chopped apples. I don't know how many lbs that is, but I think I could have easily gone up to 10 cups and had it all fit in the crust)
2/3 cup sugar, plus more for sprinkling on the pie
1/4 cup unsalted butter
1/4 tsp ground cinnamon
generous pinch of ground nutmeg
1-2 tsp vanilla extract (not called for in the Food Network's original recipe)

Put the lemon juice in a medium bowl.  Peel, core and chop the apples into 8 pieces each. Toss the apples with the lemon juice.  Add sugar and toss to combine evenly.

Melt the butter in a skillet over medium high heat.  Add the apple mixture, stir and cook until the sugar melts, about 2 minutes.  Cover, reduce heat to medium low and continue to cook for another 7 minutes or until the apples soften and release their juices.

Strain the apples in a colander over a medium bowl to catch all of the juice.  Shake the apples in the colander to try to get as much juice out as possible.  Return the juices to the skillet and continue to simmer over medium heat until thickened and lightly caramelized, about 10 minutes.

In a medium bowl, toss the apples with the reduced juice, spices and vanilla.  Set aside to cool completely. (Can be made up to 2 days ahead and refrigerated or frozen for up to 6 months). 

Place pie fillling into a bottom crust.  Layer a top crust over the filling and press edges of crusts together to seal.  Cut some small slits in the top crust to allow steam to escape while baking.  Refrigerate it for at least 15 minutes before placing it in the oven.  Brush the top crust with egg wash and dust with sugar to make it golden brown and shiny!   Cook in a 375 degree oven for about 50 minutes.

Friday, October 15, 2010

cranberry apple brown rice and rosemary chicken

Sometimes you just don't want another sweet apple dish.  After at least 3 apple crisps, an apple pie, and apple brownies, OH and apple caramel cinnamon rolls (how could I forget those?), it was time for a change of pace.

Our trusty neighborhood Stonewall Kitchen provided just the inspiration.  Aside from putting out delicious little samples of their jams and things, Stonewall Kitchen provides free recipe cards in their stores with ideas for how to use their products in something more than toast.  I picked up a recipe for apple cranberry wild rice and adapted it to fit what we had in the pantry.  I didn't have Stonewall Kitchen's apple cranberry chutney, so I made my own version.


Apple Cranberry Chutney

2 tbs butter
1 medium onion, chopped (preferably yellow or vidalia)
2-3 medium apples, chopped
1/4 cup orange juice
3 ish tbs brown sugar
1 cup cranberries
salt and pepper to taste

I sauteed everything except the cranberries until the apples were soft and the onions translucent.  I added the cranberries and sauteed for a bit longer.  They cooked really quickly, which I didn't really expect.  I had never cooked with fresh cranberries before this recipe, but I bought some at the store like a week prior just because I'm crazy like that. 

Yes, buying fresh cranberries without knowing what to do with them qualifies as crazy in the often monotonous world of bed and breakfasts. 

Anyway, I had to add this chutney to some rice, right?  So, I followed the Stonewall Kitchen recipe a bit more here.  


Apple Cranberry Wild Rice

1/4 cup butter
1/2 cup leeks, white portion, chopped
1/2 cup pecans, coarsely chopped
1 clove garlic, minced
1 cup rice, rinsed and drained (I had brown rice, but the recipe actually calls for 1/2 cup wild rice and 1/2 cup basmati)
2 cups chicken broth (I used water)
1/2 cup apple cranberry chutney

Melt the butter in a medium saucepan over medium heat.  Add the leeks and pecans and saute until the leeks are soft.  Ad the garlic and sautee for 1-2 more minutes.  Do not let the garlic brown.

Add the rice, chicken broth (or water and 1/2 tsp salt).  Cover and cook according to rice package directions.   If you're using two different rices, like in the Stonewall Kitchen recipe, add them according to their respective cooking times (aka the wild rice should go in about 10 mins before the basmati).  When the rice is finished cooking and all of the liquid is absorbed, turn off the heat and let the rice stand for 5 minutes.  Then fluff and add 1/2 cup of the apple cranberry chutney (or more, if you're like me). 


The chicken, I just cooked in a cast iron skillet in some olive oil, with whole smashed clothes of garlic and whole sprigs of rosemary to add flavor. The chicken was good, but the flavoring was pretty subtle. I'm trying to think of a way to get more flavor into it. It was based on a recipe for rosemary steak that our friend Charlie made when he visited...we need to get that recipe from Charlie, because it was much more flavorful than my chicken turned out to be.  

The peas and pearl onions came frozen in a cardboard box that I popped in the microwave for 4 minutes! :)

Friday, October 8, 2010

best-ever chicken pot pie

Dan and I are moving back to Colorado in 18 days.  EIGHTEEN. I didn't even realize it was that few until I just counted.  Holy cow.  That's pretty soon.  We need to start packing.

Anyway, since we're moving very soon, my latest goal has been to try my very best to use up all of the various pantry items we've accumulated over the summer.  This is going to be no small feat.  When you run a bed and breakfast you tend to have some pretty random groceries (like maple syrup extract and 93462 boxes of cereal)....not to mention the 10 million boxes of couscous I bought when they were on sale.  Whoops.  Things are going to either get pretty boring or pretty inventive.  Maple flavored couscous with fruit loop croutons?  We shall see.


Last night, I was trying to think of the best way to use up two chicken breasts (amongst other things) that we had in our fridge and luckily came up with an amazingly delicious combination.  (I know, chicken doesn't county as a pantry item...but cut me some slack because it's so good and I know you'll want to make it.)  It was cold and rainy outside, so I was really in the mood for some delicious comfort food.  After looking through several cookbooks, I finally settled on the Pioneer Woman's chicken pot pie. Sometimes I wonder why I even bother looking in other cookbooks. 


Dan and I adapted her recipe quite a bit to try to use things up (carrots, celery, corn, peas, etc), but after eating our version, I can't imagine it any other way.   First of all we added garlic.  Second of all, we added bacon (Dan's ingenious idea).  I'm pretty sure Ree would approve.


Best-Ever Chicken Pot Pie
adapted from Pioneer Woman's Chicken Pot Pie

2 boneless, skinless chicken breasts
1 bay leaf
5-10 whole peppercorns
1 cup brown rice
3 slices bacon
1 medium yellow or vidalia onion, finely chopped
2 cloves garlic, diced
1 carrot, finely chopped (you could use more, but to be precise we had exactly 4 baby carrots)
3 stalks of celery, finely chopped
1 (ish) cup of frozen peas
hot pepper flakes (if desired)
1 cup flour
1 can cream-style corn
2 cups chicken broth
3/4 cup heavy cream
1-2 tsp herbes de provence (or your favorite dried herb/herbs)
salt and pepper

1/2 recipe Perfect Pie Crust (see previous post) or other pie crust of your choice (**or see note at bottom of post**)

Put the chicken breast in a pot and cover it with water.  Add a bay leave and peppercorns.  Bring water to a boil.  Reduce heat to a simmer and continue to cook until chicken is done. About 20 minutes (?) I can't remember, sorry!

Cook the brown rice according to package directions.

Meanwhile, cook 3 strips of bacon in a large pot.  When the bacon is done to your desired crispness, remove the slices but keep the fat.  Add all of the chopped vegetables, the frozen peas and the hot pepper flakes (if desired) to the bacon fat and cook over medium heat until onions are translucent.  Add the can of cream-style corn.

When chicken is done, remove it from the liquid and chop into bite size pieces.  Add chicken and cooked rice to the vegetable mixture.  Sprinkle flour over the top and stir.

Add the two cups of chicken broth (I had a cup and a half of leftover canned and added some of the broth the chicken had cooked in for the rest). Add the 3/4 cup heavy cream. Chop up the cooked bacon slices and add them to the pot. Add the herbes de provence, and salt and pepper. Stir and allow the mixture to heat through and thicken for a few minutes.  Taste and double check the seasonings!

Pour the mixture into a deep dish pie pan or small casserole dish.

Roll out the Perfect Pie Crust (make sure you've let it thaw for a bit or it will just crack) and fit over the top of the pan.  Gently press the crust into the edges of the dish to seal. Place the pie plate on a baking sheet and put in the oven.

Bake for 30 minutes at 400 degrees, until the crust is light brown and the filling is bubbly. Cool for 10 minutes before serving.

**serving note: while I liked this as a pot pie, I think with just a little more broth or cream or perhaps without all of the flour (or even just as is!) it could be a really great, thick, chicken and rice soup.  I think it would be great ladled onto biscuits! Yum.**

Pioneer Woman's Perfect Pie Crust

Try saying the title of this post 3 times fast.  Yikes.


Here is the recipe for the Pioneer Woman's go-to pie crust.  It is quite flaky and good, although as you can see in the picture below, I had a very hard time rolling it out and transferring it to the top of my pot pie (recipe for that comes in the next post).


Perfect Pie Crust
from the Pioneer Woman Cooks

3 cups all-purpose flour
1 tsp salt
1 1/2 cups vegetable shortening
1 egg
5 tbs cold water
1 tbs distilled white vinegar

Combine the flour and salt in a large bowl.  Add in the shortening.  Using a pastry cutter (or two forks!), gradually work the shortening into the flour until the mixture resembles tiny pebbles. (3-4 minutes)

Lightly beat the egg and add it to the mixture.

Add the cold water and the vinegar.

Stir the mixture together until it's just combined, then remove half of the dough from the bowl.

Place in a large plastic bag (do not seal) and slightly flatten with a rolling pin.  (This makes it easier to roll out later.)  After flattening, seal the bag tightly.  Repeat this process with the other half of the dough and place both bags in the freezer.

When you're ready to use the dough, take it out of the freezer about 20 minutes in advance, so it can have time to thaw slightly.

Lightly flour your working surface and roll out the dough to the desired shape (check often to make sure it's not sticking to the counter).

Thursday, October 7, 2010

buttercup squash soup

Our vegetable garden produced two buttercup squashes for us.  I happen to absolutely love squash, so I was determined to come up with good ways to use them.  When the weather started getting cool, I knew a squash soup would be perfect.


I found a great recipe on foodnetwork.com for the soup.  I like going to the Food Network's website when I want to find a recipe that's not super complicated and also, therefore, not very expensive to make.


I forgot to take pictures during the cooking process, so you'll just have to believe me when I say that it was really easy to make. 


Ingredients
  • 3 tablespoons butter
  • 3/4 cup coarsely chopped onion
  • 2 carrots, peeled and coarsely chopped
  • 1 potato, peeled and coarsely chopped
  • 1 jalapeno, seeded coarsely chopped
  • 1 buttercup squash, peeled, seeded and chopped
  • 4 cups chicken stock or water
  • 1/2 cup cream
  • Salt and pepper
  • Sliced scallion and diced red pepper, for garnish

Directions

In a large pot, melt butter and cook onions until tender. Stir in carrots and jalapeno and toss to coat. Stir in chopped squash. Pour in chicken stock and bring to a simmer. Simmer for 30 minutes until vegetables are tender. Puree soup in blender in batches. Return to pot and stir in cream. Season to taste and garnish with sliced scallion.

Thursday, September 23, 2010

apple crisp

When life hands you apples, make apple crisp.  It's delicious, it's easy, and it's pretty healthy (as far as desserts go).  Oh, and did I mention it's delicious?


In the past week, I have made this recipe twice.  I am about to make it again to serve to our guests as part of breakfast tomorrow morning. You see, it's apple season and we have tons of apples.  We haven't even been apple picking yet! My mom brought us up a lot of apples and I wanted to come up with lots of creative ways to use them, but then I made this apple crisp and now I'm having a hard time motivating myself to make anything else.  


Whenever something calls for packed brown sugar, it always reminds me of building sandcastles as a kid.  I wish we had been taught to build brown sugar castles instead.  Actually, come to think of it, we did build sugar cube castles in 1st Grade.  I remember it was always a really difficult decision about whether to glue the sugar cube onto the castle or try to sneak it into my mouth....but I digress...

This recipe is actually from the Better Homes and Gardens cookbook.  Sometimes I feel like if I use that cookbook, I'll be boring, but this apple crisp is very good.  In an effort to keep myself exciting, I potentially have grand plans of making other versions of apple crisp and turning Dan and myself into apple crisp connoisseurs. 


Alright, so the picture's a little blurry, but you get the point.  It's so good! And doesn't that look easy? The hardest part is peeling the apples and I even left half of them un-peeled.  All the nutrients and color are in the peel, so I figured why not make life easier and keep 'em on?


Apple Crisp from the Better Homes and Gardens New Cookbook

5 cups sliced, peeled (optional) apples (or use any kind of fruit you'd like: peaches, pears, etc)
2 to 4 tbs sugar
1/2 cup regular rolled oats (not instant)
1/2 cup packed brown sugar
1/4 cup all-purpose flour
1/4 tsp nutmeg, ginger or cinnamon
1/4 cup margarine or butter
1/4 cup chopped nuts (I didn't have nuts and therefore omitted this ingredient)
vanilla ice cream or whipped cream to serve

For the filling, place fruit in an 8x 1.5 " round baking dish.  Stir in sugar.

For topping, in a mixing bowl, combine oats, brown sugar, flour and nutmeg, cinnamon or ginger. Cut in margarine or butter until mixture resembles coarse crumbs (I find using clean hands is most effective).  Stir in nuts if using. Sprinkle topping over filling.

Bake in a 375 degree oven for 30-35 minutes or until the fruit is tender and topping is golden.  Serve warm with ice cream or whipped cream.  Serves 6.

Saturday, August 28, 2010

lemon fusilli (or farfalle) with arugula (or broccoli)

Maven: someone who is dazzlingly skilled in any field.  Don't you just love that definition?  Wouldn't you love to be called a maven of something? Anything? I know I would! What a compliment.

Well, after singing Martha's praises in my last post, I wanted to pay homage to another kitchen maven, Ina Garten.  I love Ina.  Some people feel she's pretentious.  I just think she's dazzlingly skilled.  She's another one whose recipes I know I can infallibly trust.


With Dan being gone, I was bored out of my mind and had no real dinner plans. I was craving some sort of macaroni and cheese (shocking, I know).  But not something super heavy, you know?  It was hot out and I didn't feel like anything too rich.  I figured Annie's mac and cheese would have been perfect, but lo and behold, we had none.  How this is possible, I honestly don't know.  I think it's a crime against humanity to not always have a box of Annie's just waiting in your cupboard.  I flipped through my Barefoot Contessa cookbook and found her recipe for lemon fusilli with arugula. I had a winner.

Now, I didn't have fusilli or arugula and I didn't want as much as the recipe called for, but I was determined to make this work.  So, I halved the recipe.  Used half cream and half half and half (whoa halves!) because I ran out of cream.  I used farfalle instead of fusilli and about a cup of chopped brocolli (which I par-boiled with the pasta when it was just about done) instead of arugula.

It was still perfect though.  Just creamy and cheesy enough to remind me of mac and cheese, but light enough with the lemon and vegetables that it wasn't overwhelming on a summer night.  Yum.  Writing about it is making my stomach growl.


While my version came out great, I'm going to write the full recipe here. It was so good that unless you're only making this for one person, you should make the full batch.  I can't wait for Dan to come home so I can have an excuse to make this again.

lemon fusilli with arugula
from Barefoot Contessa at Home

1 tablespoon good olive oil
1 tablespoon minced garlic (2 cloves)
2 cups heavy cream
3 lemons (I think 2 would work if they're large)
kosher salt and freshly ground black pepper
1 pound dried fusilli pasta
1/2 pound baby arugula (or 2 bunches regular arugula, stems removed and leaves cut into thirds)
1/2 cup freshly grated Parmesean cheese
1 pint grape or cherry tomatoes, halved

Heat the olive oil in a medium saucepan over medium heat.  Add the garlic, and cook for 60 seconds, then add the cream, the zest and juice of 2 of the lemons, 2 teaspoons salt, and 1 teaspoon pepper.  Bring to a boil, then lower the heat and simmer for 15 to 20 minutes.

Bring a large pot of water to a boil, add 1 tablespoon salt and the pasta and cook al dente according to the directions on the package, about 12 minutes, stirring occasionally. Drain the pasta and return it to the pot. Immediately add the cream mixture and cook over medium-low heat for 3 minutes, until the pasta has absorbed most of the sauce.  Pour the hot pasta into a large bowl and add the arugula, Parmesean and tomatoes. Cut the last lemon in half lengthwise (I skipped this step), slice it 1/4-inch thick crosswize, and add a few slices to the pasta.  Toss well, season to taste, and serve hot.

Friday, August 27, 2010

strawberry-rhubarb coffee cake

Got rhubarb? Make a pie, right? Wrong. If you're going to make one strawberry-rhubarb thing before you run out of time, I think this should be it.  Throw away those grandiose ideas of pie.  Pie crust is so tricky.  And even if you buy pre-made crust like I often (read: always) do for quiches or even if you're a pro at making pie crusts, make this coffee cake instead.  Everyone expects a strawberry-rhubarb pie.  And while I would never, ever turn down a slice (or three), I do think that this strawberry-rhubarb coffee cake is an incredibly delicious and unexpected dessert or breakfast (bonus!).


The recipe is from Martha Stewart's Annual Recipes 2003 cookbook.  This book has yet to let me down.  That Martha, always getting it right.  How does she do it? The awesome thing about her is that I know that her recipes are going to be fantastic.  I don't have to worry.  Also, the recipes I've made from the cookbook have been surprisingly simple.  I always think of Martha as doing these crazy things that us mere mortals could never do, but so far (knock on wood/refer to previous post), I've found them pretty easy!


Now, I made this recipe with frozen strawberries.  I'm sure that's not how Martha intended and I do think mine came out a bit more liquid-y than hers.  It still tasted phenomenal though, and that's all that really matters.


strawberry-rhubarb coffee cake
from Martha Stewart Living Annual Recipes 2003

1 1/4 cups chilled unsalted butter (2 1/2 sticks), plus more, softened, for pan
1/4 cup freshly squeezed lemon juice (about 2 lemons)
1/3 cup cornstarch
2 3/4 cups sugar
1 pound strawberries, hulled and sliced (about 2-3 cups)
1 1/2 pounds rhubarb, trimmed and cut into 1-inch pieces (about 4 cups)
3 3/4 cups all-purpose flour
1 tsp baking powder
1/2 tsp baking soda
pinch of salt
2 large eggs
1 1/2 cups buttermilk
1 tsp pure vanilla extract

Preheat oven to 350 degrees.  Brush a 9 x 12 x 3 inch baking pan with butter and set aside.  Make fruit sauce: Combine lemon juice, cornstarch, and 1 cup sugar in a medium sauce pan.  Add strawberries and rhubarb; cook, stirring frequently, over medium heat, until rhubarb is soft and liquid has thickened, 15 to 20 minutes.  Transfer to a medium bowl; let cool. 

Make crumb topping: Combine 3/4 cup sugar and 3/4 cup flour in a medium bowl.  Melt 1/4 cup butter in a small saucepan over low heat.  Drizzle butter over flour mixture; using your hands, mix until crumbly.  Set aside.

Make cake batter: Whisk together remaining 3 cups flour and 1 cup sugar, baking powder, baking soda, and salt in a large bowl. Using a pastry knife or two forks, cut remaining 1 cup butter into flour mixture until it resembles coarse meal.  In a separate bowl, mix eggs, buttermilk, and vanilla.  Pour into flour mixture; stir to combine.

Spread half the cake batter evenly into the prepared pan. Top with half the fruit sauce. Carefully spread the remaining batter over the fruit, and top with the remaining fruit sauce.  Sprinkle with the crumb topping.

Bake until cake is golden brown, about 1 hour. Transfer pan to a wire rack to cool slightly.  Serve warm or at room temperature, cut into squares. 

Tuesday, August 24, 2010

stuffed green peppers

In our quest to eat as locally as possible, Dan and I rode our bikes to the Aldermere Farm to buy some Belted Galloway beef the other day. It turns out that our beloved Oreo-Cookie cows are beef cattle.  I felt kind of bad about eating one of the cuties, but justified it by knowing that it is almost 100% grass fed and comes from less than 2 miles from our house. 


I tried to choose the least cute cow picture I have....unfortunately, these cows are pretty cute.  But guess what?  Their meat is healthy (as far as beef goes) and they taste really good too! Eek...should I not say that? 

I didn't want to make just anything with this ground beef (we also bought some top sirloin to try for now).  I wanted it to be something kind of special.  I also wanted to stick with the local theme.  So, I decided to make stuffed green peppers.  The peppers were from a local farm and the onion, too.  And I used herbs, spicy red peppers, and tomatoes from our garden.  Go me.


I love how the peppers looked after chopping off the tops of them.  I also love how the tops stayed in tact; they're perfect for future use in salads, etc.


This is a picture of the blanched peppers stuffed with the beef mixture.  I then topped them with tomato sauce (from a jar, whoops, there goes my locavore status) and grated romano cheese.

Here's what the final product looked like:


There were only two left at this point, because by the time we could take them out of the oven, they smelled so delicious that I completely forgot about taking pictures and just devoured mine.  Mmmm.

Stuffed Green Peppers
Adapted from allrecipes.com

4 large green bell peppers (try to pick ones that will stand up okay on their own)
1 lb lean ground beef
1/2 medium size red onion, chopped
3 medium size tomatoes, chopped
2 small or 1 medium sized hot pepper, diced (optional)
1 tbs chopped fresh marjoram
1 tbs chopped fresh oregano
1 tbs chopped fresh parsley
1 tsp Worcestershire sauce
1 cup instant white rice
1 cup water
1 cup mozzarella cheese, shredded
1 cup canned tomato sauce (preferably not a chunky kind)
1/2 cup romano cheese, shredded

Heat water in a medium sauce pan until boiling.  Cut tops off of peppers and remove seeds.  Place peppers in boiling water for about 5 minutes. Drain.  Sprinkle salt to taste to inside of peppers.  Set aside.

Preheat oven to 350 degrees.  

Start sauteing beef and onion in a large frying pan (with a lid) for about 5 minutes or until beef is browned. Drain off excess fat and season with salt and pepper.  Add tomato, hot pepper, herbs and Worcestershire sauce.  Add rice and water.  Cover pan and simmer until rice is tender (about 5 minutes if you're using instant rice). 

Remove meat and rice mixture from the heat.  Add mozzarella cheese and adjust seasonings. 

Fill each pepper with the meat and rice mixture.  Top the peppers each with about 1/4 cup of tomato sauce.  Then top each with about 1/8 cup of romano cheese.

Bake for about 25 minutes or until the cheese is browned and bubbly. 

I think this would be delicious served with a really crispy garlic bread.  I guess there's always next time...


Monday, August 23, 2010

leek and tomato quiche and bacontarians


My friend Julie and her boyfriend Mike stayed with us this weekend. We had so much fun hiking and (yikes!) singing karaoke with them!  Mike has proclaimed that Camden is a karaoke town.  Julie is a vegetarian, so I found a great vegetarian quiche recipe to make for her that I want to share with you.


The best thing about making quiches (and maybe quiche purists would hate me for saying this...if there is such a thing as a quiche purist...) is that I can make them the night before and then just reheat them in the oven the next morning.  The extra minutes of sleep this allows me make me very happy.


We served it with fruit salad and home fries.  I think it would be great with bacon too, but Julie's a vegetarian, remember? Also, what wouldn't be great with bacon?  We had some guests this morning who told us that they used to be vegetarians, except that they still ate bacon.  They thought they were the only ones, until they started telling their friends.  Then they found out that being a vegetarian who eats bacon is actually quite common and even has it's own name: bacontarian.


Leek and Tomato Quiche
slightly adapted from allrecipes.com

2 tbs butter
2 cups leeks, washed and sliced
1 nine inch pie crust
1 cup shredded Swiss or Gruyere cheese
1/4 cup shredded Romano cheese
1 tbs all purpose flour
4 eggs
1 3/4 cups heavy cream (I used half and half and it turned out fine)
1 tomato thinly sliced
salt and pepper to taste

Preheat the oven to 450 degrees.

Saute the leeks in butter until soft and slightly translucent.

Meanwhile, line a 10" quiche dish or deep dish pie plate with the dough.  Layer the leeks on the bottom of the crust.

Combine cheeses and flour.  Layer over leeks in pie crust.

Whisk together eggs, cream and salt and pepper to taste.  Pour into pie crust.

Top with slices of tomato.

Bake at 450 degrees for 15 minutes, then lower the temperature to 325 degrees and continue baking for about 30 minutes or until crust is golden brown and a toothpick inserted in the middle of the quiche comes out clean.  Serve warm or at room temperature.

pepperoni bread

When I worked in Boston, this new girl, Katie, was hired one day.  We had a work party.  Katie brought pepperoni bread. I decided I had to be her friend, if only to get this recipe.  It worked! And we're still friends, turns out not only is Katie a good cook, but she's pretty cool too.


This recipe is really delicious, a great crowd pleaser and really easy to make.  It's perfect for all of the upcoming football parties I'm sure you're all planning to attend.  My only piece of advice would be to make two, because it's going to go fast. Scratch that, you should probably make three, that way you could keep one at home all for yourself.


Actually, I have one other tip for you:  it's best to have the dough in the middle a bit thicker than the dough at the edges.  When you fold the dough to make the loaf, you'll fold the two edges over each other.  This forms quite a bit of bread on the bottom of the loaf.  So if you keep the edges thin, your dough will be more evenly distributed around the fillings.  


I made this as a surprise for Dan.  When he came home and saw it he exclaimed, "a homemade hot pocket!!!" Kind of true, but this is so much better.  


Pepperoni Bread
from Katie Ballard

1 loaf frozen bread dough (I use pizza dough...not sure if this makes a difference...Katie?)
1 egg
1 tsp parsley
1 tsp oregano
pepperoni slices
1 cup grated mozzerella cheese (I usually use more than this!)
sesame seeds
marinara sauce (optional), for serving

Thaw frozen bread dough.  Spread dough into large rectangle on greased cookie sheet (Pam works).

Preheat the oven to 375 degrees. Make an egg wash by mixing egg, oregano, and parsley.  Spread 1/2 the egg wash on dough almost to edges.

Layer pepperoni slices, 3 or 4 to a row, down center of the bread dough.

Sprinkle cheese over pepperoni.

Fold bread dough over filling, one third over then the last third over (you may have to stretch the dough). Close open ends the same way. Flip
dough over so seam is underneath.

Spread loaf with remaining egg wash and sprinkle with sesame seeds.

Bake at 375 degrees for 20-25 mins. until golden brown.